
Tea Party Series: Mini Top Hats
SHARE
This project started out as full sized top hats for kids to wear, it took quite a bit of perfecting on my end. I started trying to create a top hat that my son could wear. I did technically win that battle, but it was very hard and took three failed attempts . . . so I improvised and created a different way of thinking about it: Mini Top Hats. Which both my son and I agreed was far easier and way more silly and fun. Mini Top Hats took zero energy and was fast and easy. (If you’re interested in the big Top Hats, I will put a couple images up and the pattern, but be warned if you aren’t super crafty this one might annoy you.)
WHAT YOU NEED:
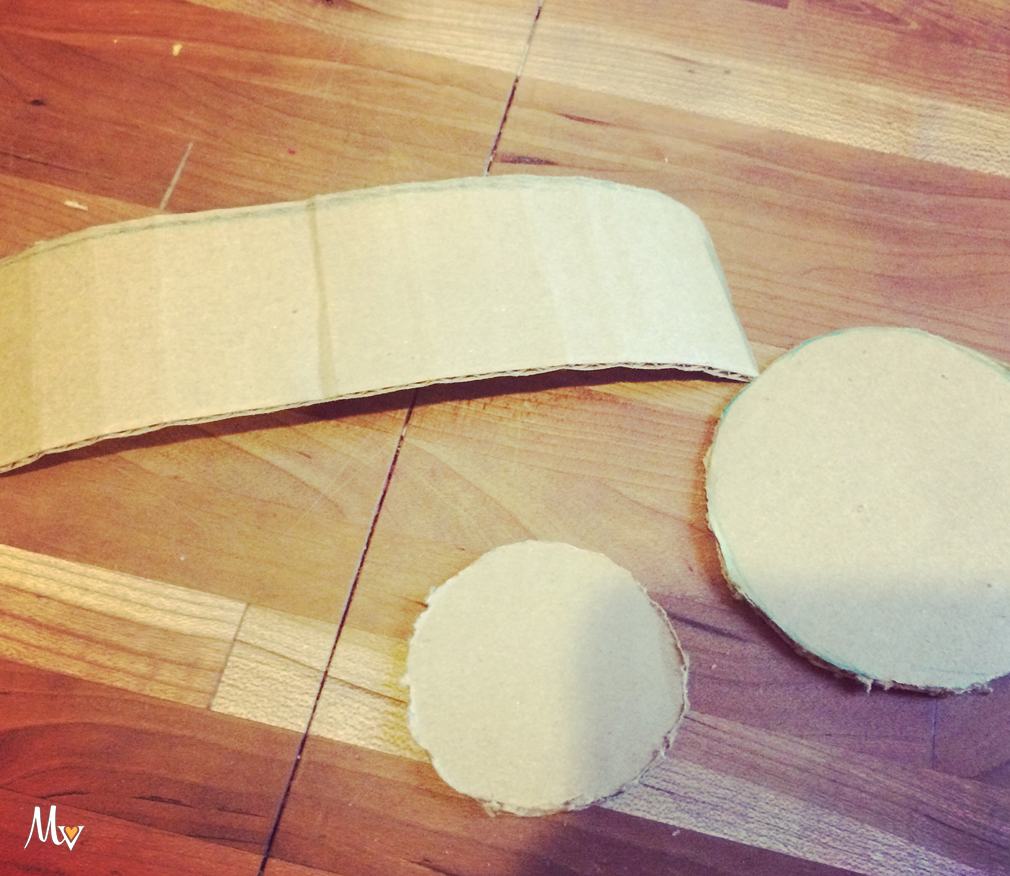
Cardboard
Fabric Glue
1/4 Yard of Fabric
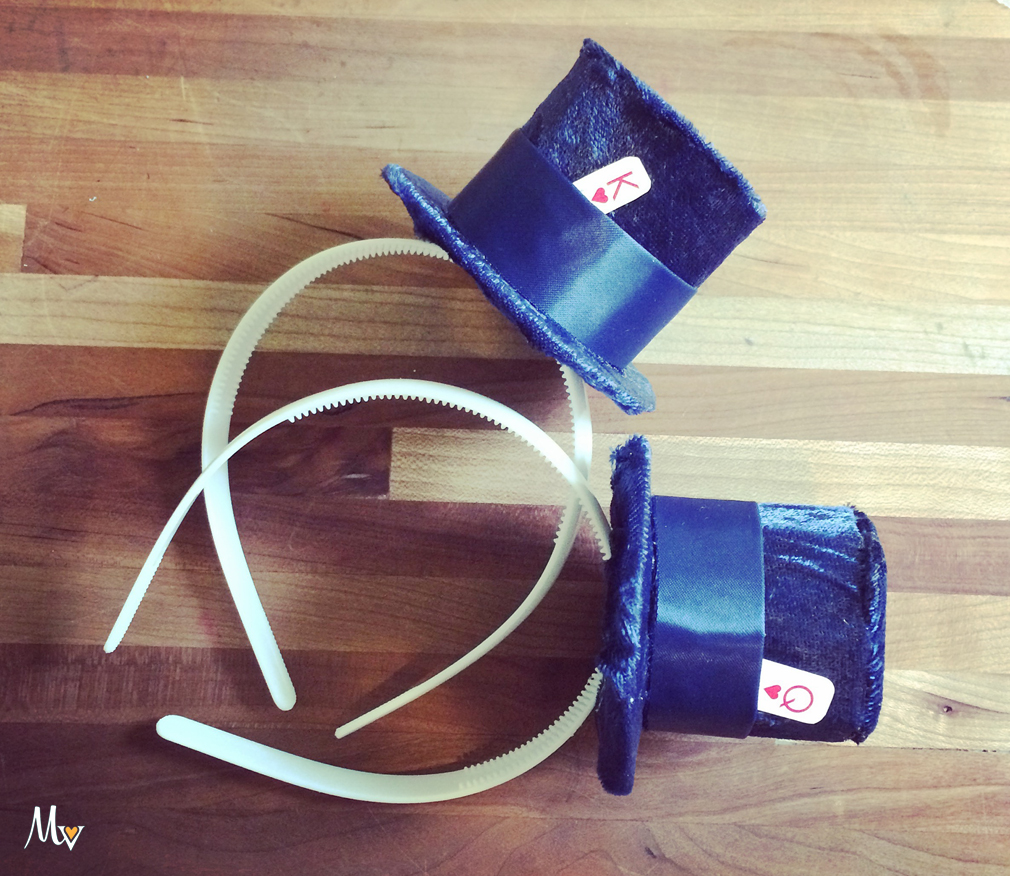
1 HeadBand
9 Inches of Ribbon
1 Card
Printer/Paper
DIRECTIONS
1 Print the Mini Top Hat template.
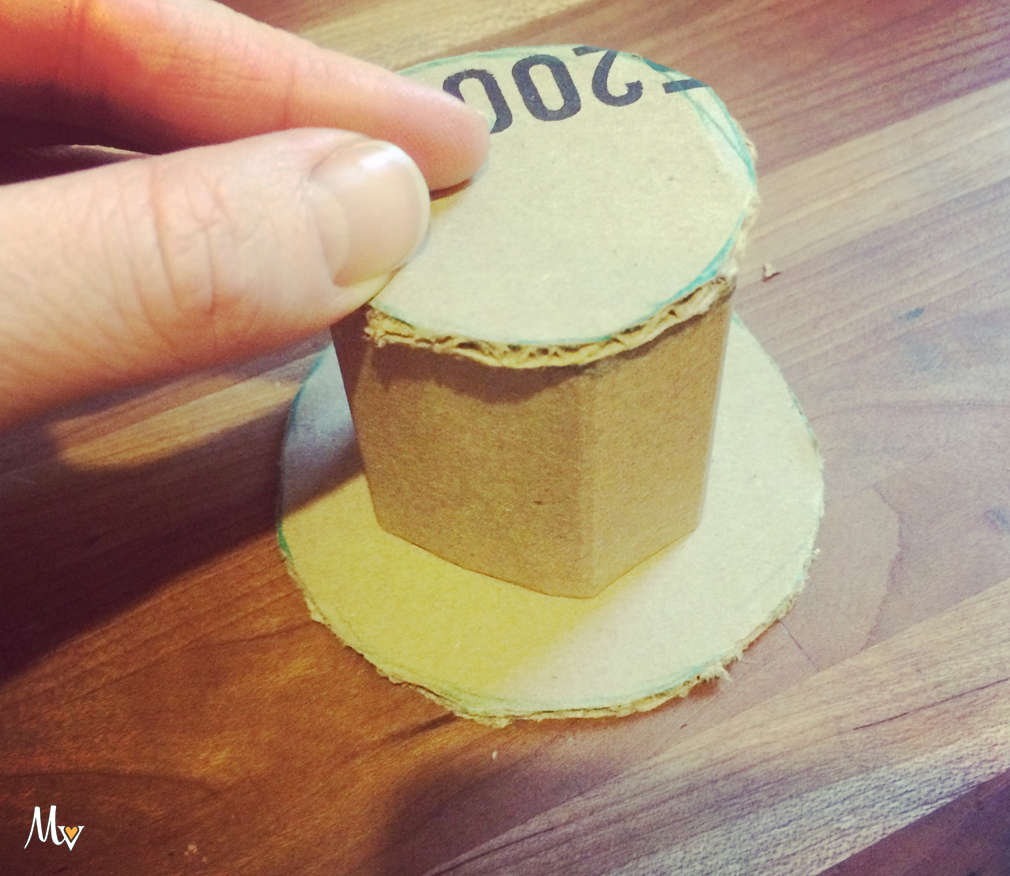
2 Cut the shapes out of the cardboard.
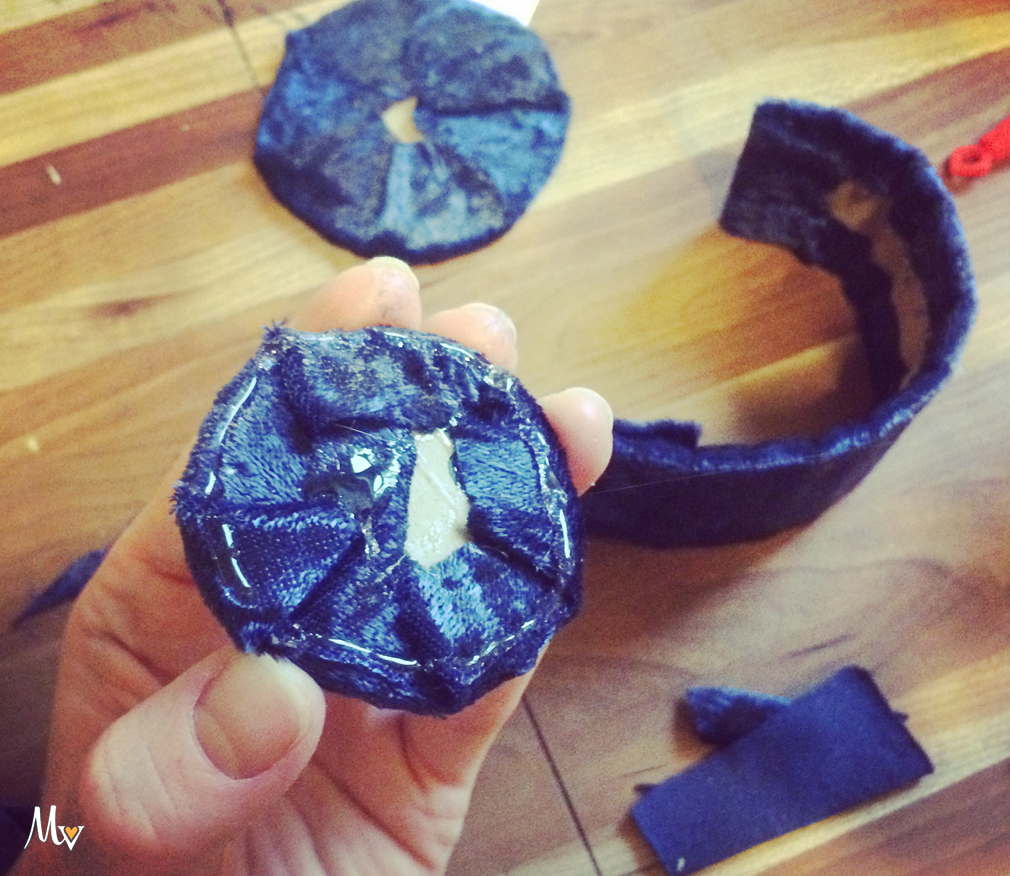
3 Glue each piece to the fabric, wrapping it around all the edges.
4 Glue the Crown in a circle, once secure, glue the Top to it.
5 Next glue the Crown and Top to the Brim.
6 Cut the ribbon to size and glue to the hat.
7 Trim the edge of a playing card and slide it under the ribbon. Glue it to secure it in place.
8 Glue the hat to a headband, slightly off to the side is best.
9 Let the party begin!